Adding Comments to a Static Site Hosted on Netlify and built with Eleventy (11ty)
Feb 3, 2025
Overview
This blog was previously hosted on Bluehost and built with Wordpress. It was slow (scored a 32 on a Google pagespeed test), bloated, poorly structured and felt overall dated. Writing content in Wordpress always felt convoluted to me and I often found myself distracted by the editing experience. Overall, I wasn't really in love with my setup so I decided after nearly a decade it's time I revisit my design choices.
I rebuilt this blog from scratch as a static site using Eleventy (11ty) as the static site generator and Netlify as my hosting service. A hand-written custom solution like this can be clean, well structured, easy to manage and as fast as you want (I'm now scoring 97-100 on the pagespeed test). This is the same solution I use when building websites for my clients, so it's about time my poor old blog gets a little TLC.
The content on this site is static meaning there's nothing dynamically loaded from a database and rendered on-the-fly. With that, all content for each post must be known ahead of time (pre-rendered). Blog posts are written as markdown and stored alongside all the other content for this site (e.g. css, images, js). When my site is built 11ty handles the heavy-lifting of converting these markdown files to HTML (by using a plugin) then injecting them into several 11ty layout files that make up the structure of my site, resulting in a post like this one.
The source for this website is controlled by git and managed in GitHub. Netlify integrates with GitHub and watches for changes to a specified branch. When a change occurs (a new commit is received), Netlify kicks-off a new build of my site then deploys the artifacts (the rendered source-code containing every blog post, pages etc) to its CDN where it's accessible to you.
Managing the content of the site is done by me through this process. I make changes locally, commit and push them upstream to GitHub's tracking repository, then Netlify triggers a new build and deploys my changes.
Comments are written by you, the reader. You don't have access to the typical flow of modifying my site, so how can you add a comment? That's what this post will cover in detail.
Adding Support for Blog Post Comments
At a high-level a comment must flow through the same build and deploy process as any other content. That's all a comment is, more content for the site, it's just added afer the fact.
To support this the following new workflow must be built into the website:
- A form will be made available to each blog post to capture data for a comment.
- A server-side function will be triggered when the form/comment is submitted. This function will validate and process the comment, merge it with any existing comments for a post, then open a new Pull Request (PR) against my Git repository.
- GitHub will notify the repository owner (me) of a new Pull Request. I'll review the request and merge it into the main branch.
- Netlify will see a new commit which will trigger a new build and deploy of the site.
- The site will render comments when a post is loaded and display them to the user.
This approach takes advantage of the existing tooling and workflow already available to a static site sourced by GitHub and hosted on Netlify. There's no need to build an admin dashboard for managing comments etc, you get this free from GitHub pull request. The server-side function acts as a proxy between the commenter and the Git repository, and the pull request acts as a guard which allows time for review and approval of potential changes to the site.
Why add the guard (pull request)? A form is public, can be abused and is prone to bots. The pull request prevents the chance of someone (or something, a bot) creating spam and redundant work for the Netlify server. Remember, each commit to the main branch means a site-wide build and deploy. It's a good idea to add a checkpoint before letting that happen.
Adding the form will be the last step in the process. That way if a visitor to the site happens across the new comments form and decides to submit one, that comment will have somewhere to go! We'll work backwards from setting up Git, building the server-side functionality then finally creating the form and comments section.
Configuring GitHub
The server-side function will need permissions to read/write to/from the Git repository in GitHub. That means an access token must be granted. I followed the GitHub docs to create a personal access token. Note that the "classic" personal access token grants broad access across all repositories you have access to. This is unnecessarily broad for the purposes of adding a comment. If you want, create a fine-grained access token with specific permissions.
Each comment will create a new temporary branch and pull request in your repository. This can get ugly quick if those branches aren't cleaned up after the pull request is merged or closed. GitHub can be configured to automatically take care of this for you:
- Open the repository, then click Settings in the menu bar.
- Click General in the left-hand menu, then scroll down to the Pull Request section.
- Check the box Automatically delete head branches. The description for this checkbox from the page says "After pull requests are merged, you can have head branches deleted automatically".
That's it, now the branch associated with any pull request in this repository will automatically be removed once that pull request is resolved.
Building the Netlify Server-Side Function to Process Comments
A Netlify Form is a normal HTML form pre-wired by Netlify to handle (and react to) form submissions on your behalf. A server-side function can be triggered when a Netlify form submission event occurs. When a comment is submitted a server-side function needs to be automatically invoked.
There are two ways to trigger a function when a form submission is received: by using a webhook notification which will make an HTTP request to your function or by creating a specially named trigger event function which is invoked by Netlify when a matching event occurs. When Netlify invokes a built-in event function (e.g. submission-created) they verify the JSON web signature (JWS) they generated for that event matches what's passed to the function. This extra step ensures the function can only be invoked internally by Netlify when an event occurs. Conversely, other functions are publicly addressable and can be invoked manually. Manually invoking a function bypasses the form entirely, so this implementation will leverage the submission-created event handler.
Note: you can achieve the same JWS behavior in WebHooks by passing and validating your own JWS secret token as part of the HTTP request (it's an optional field when configuring the hook).
Create the submission-created event handler skeleton implementation
This function will be responsible for turning an incoming comment form submission into a pull request in GitHub. To achieve this the function will need to parse the incoming request, read/write from/to GitHub, and have a place to store comments so the blog post's layout template can access them.
Want visitors to be able to use markdown in comments? To avoid adding more to an already lengthy post I wrote a separate post describing how to add markdown processing to this function. Head over there if that's a feature you want to support.
Netlify supports building and testing functions on your local machine via the Netlify CLI. Install the CLI as it'll be used later to test the function at various checkpoints.
Add the @netlify/functions module to your website project (read more):
npm install @netlify/functionsAt the root of your website's directory create a new folder called netlify/functions. This is the default directory Netlify will look for functions in. You can customize this, but for now use the default. Add a new file called submission-created.mts (the name is important, don't change it) within this folder containing the following code:
import { Context } from "@netlify/functions";

interface PostComment {
  created_at: string;
  data: PostCommentData;
}

interface PostCommentData {
  name: string;
  comment: string;
  referrer: string; // what page the user submitted a comment from
  website: string | undefined;
}

export default async (request: Request, context: Context) => {
  console.log("Function invoked!");

  try {
    const {
      data: { name, comment, website, referrer },
      created_at,
    }: PostComment = (await request.json()).payload;
    console.log(comment);
    console.log(JSON.stringify(context));

    if (!name || !comment || !referrer) {
      console.error(
        `Missing at least one required field. Name: ${name}, Comment: ${comment}, Referrer: ${referrer}`
      );
      return { statusCode: 400, body: "Name and comment are required!" };
    }
    return new Response(`Thanks for commenting!`);
  } catch (error) {
    console.error(`An unexpected error occurred: ${JSON.stringify(error)}`);
    return new Response(error.toString(), {
      status: 500,
    });
  }
};
The structure of the body of a Netlify built-in event looks like this:
{
  "payload": {
    # information about the object that triggered the event
  },
  "site": {
    # information about the associated site
  }
}
site has a lot of information about the site itself (e.g. storiknow.com). payload has information about the form submission, like created_at and data. Here's an example payload from a submission I created on my site (truncated for brevity):
{
  "payload": {
    "data": {
      "name": "Sam",
      "website": "storiknow.com",
      "comment": "Nice post!",
      "referrer": "https://storiknow.com/add-comments-to-static-site-built-with-netlify-and-eleventy/"
    },
    "created_at": "2025-01-22T19:52:16.356Z"
  },
  "site": {
  }
}
The function's implementation so far will materialize the incoming form submission data into a concrete object, PostComment, then log its results. To test the function materializes data properly we need to pass sample data to the function when invoked. Create a new folder called test-data within the netlify/functions folder. Add a file post-comment.json with the contents of the example payload shown above. Your project folder structure should look something like this (tree generated with this plugin):
📦storiknow
 ┣ 📂netlify
    ┗ 📂functions
    ┃ ┣ 📂test-data
    ┃ ┃ ┗ 📜post-comment.json
    ┃ ┗ 📜submission-created.mts
 ┣ 📂src
 ┃ ...
 ┣ 📜.eleventy.js
 ┣ 📜.env
 ┣ 📜.gitignore
 ┣ 📜package.json
It's time for a test: spin-up a local development server for your website using the Netlify CLI by running the following command from the root of your project:
netlify devThe command should execute successfully and your website should launch in a browser. This terminal will output any logs coming from the dev server, keep it open and handy. In a new terminal invoke the function and pass it the sample data from the JSON file you created:
netlify functions:invoke submission-created --payload './netlify/functions/test-data/post-comment.json'The terminal should output logs similar to:
Request from ::1: POST /.netlify/functions/submission-created
Function invoked!
Nice post!
{"account":{"id":""},"cookies":{},"deploy":{"context":"dev","id":"0","published":false},"flags":{},"geo":{...},"ip":"::1","params":{},"requestId":"...","server":{"region":"dev"},"site":{"url":"http://localhost:8888"},"url":"http://localhost:8888/.netlify/functions/submission-created"}
Response with status 200 in 88 ms.
Success! You now have a function that can receive and parse form submissions, a means for testing it locally and proof it works as expected. With that confidence you're ready for the next step: merging incoming comments with existing post comments.
Having trouble getting through this first checkpoint? Leave a comment with the issue you're having and I'll lend a hand best I can!
Merge Incoming Comment with Existing Post Comments
After proving the function works with an end-to-end test it's time to load existing comments for a post from GitHub, if any, and merge the incoming comment with them.
In order to render comments for a post 11ty needs to know where to look for post specific data. Post data will be stored in an 11tydata file alongside the post itself in JSON format. 11ty will look for 11tydata files when converting the post markdown into a static artifact and pass it to the 11ty layout template during rendering (which will be covered later).
The 11tydata file will have the same name as the slug/url/markdown file for the post being commented on with the file extension being .11tydata.json. This naming convention will allow the function to use the referrer field of the incoming form submission data to determine which file contains comments for post. For example, if you were to add a comment to this post I'd see a referrer field in the payload of:
https://storiknow.com/add-comments-to-static-site-built-with-netlify-and-eleventy/Following the convention the markdown file and 11tydata file would then be:
add-comments-to-static-site-built-with-netlify-and-eleventy.md
add-comments-to-static-site-built-with-netlify-and-eleventy.11tydata.json
This naming convention provides a simple way to map an incoming post comment (via the referrer field) to an 11tydata file. Alternatively, you could add a hidden field to the comment form that describes what 11tydata file to update. It doesn't matter so long as you have a way to know where an incoming comment should be stored.
The following code will use an instance of GitHub's API client Octokit to load post data from the 11tydata file if it exists then append a comment to it. The Octokit client authenticates with your GitHub repo using the personal access token you created before. Access tokens should never be committed to version control, instead they should be stored in an environment variable. Install dotenv, a module that supports loading environment variables from a .env file:
npm install dotenv --saveCreate a new file at the root of your project called .env, and populate it with the following (replacing the right-hand parts):
GITHUB_TOKEN=<your access token>
REPO_OWNER=<your github username>
REPO_NAME=<your repo name>
Your function can now access these variables using process.env, for example:
const GITHUB_TOKEN = process.env.GITHUB_TOKEN;Replace the contents of the submission-created.mts with the below code which does the following:
- Materialize the incoming
requestinto aPostComment. - Extract the
postNamefrom the form submission data'sreferrerfield. - Create an instance of
octokitusing theGITHUB_TOKENenvironment variable. - Pass the
postNametogetPostDatawhich loads the existing 11tydata for the post and returns theshaof the file (used later) andpostData. If no 11tydata is found (i.e. no comments exist on a post yet) an emptyshais returned and a default emptypostDataobject is created (with an emptycommentsarray). - Append the incoming comment to the
postDatacomments array, using the current epoch time in milliseconds as a cheap UUID (not exactly unique, but good enough for post comments). - Log the results.
import { Context } from "@netlify/functions";
import { Octokit } from "octokit";

const GITHUB_TOKEN = process.env.GITHUB_TOKEN;
const REPO_OWNER = process.env.REPO_OWNER;
const REPO_NAME = process.env.REPO_NAME;

interface PostComment {
  created_at: string;
  data: PostCommentData;
}

interface PostCommentData {
  name: string;
  comment: string;
  referrer: string; // what page the user submitted a comment from
  website: string | undefined;
}

interface PostData {
  comments: {
    id: number;
    createdBy: string;
    html: string;
    date: string;
    website: string | undefined;
  }[];
}

export default async (request: Request, context: Context) => {
  console.log("Function invoked!");

  try {
    const {
      data: { name, comment, website, referrer },
      created_at,
    }: PostComment = (await request.json()).payload;

    if (!name || !comment || !referrer) {
      console.error(
        `Missing at least one required field. Name: ${name}, Comment: ${comment}, Referrer: ${referrer}`
      );
      return { statusCode: 400, body: "Name and comment are required!" };
    }

    const postName = new URL(referrer).pathname.replaceAll("/", "");
    const octokit = new Octokit({ auth: GITHUB_TOKEN });
    const {
      sha,
      postData,
    }: {
      sha: string;
      postData: PostData;
    } = await getPostData(octokit, { fileName: postName });

    const now = Date.now();
    postData.comments.push({
      id: now,
      createdBy: name,
      date: created_at,
      html: comment,
      website: website,
    });

    console.log(JSON.stringify(postData));

    return new Response(`Thanks for commenting!`);
  } catch (error) {
    console.error(`An unexpected error occurred: ${JSON.stringify(error)}`);
    return new Response(error.toString(), {
      status: 500,
    });
  }
};

async function getPostData(octokit, { fileName }): Promise<{ sha; postData }> {
  let content: PostData;
  try {
    const { data: fileData } = await octokit.rest.repos.getContent({
      headers: {
        accept: "application/vnd.github+json",
      },
      owner: REPO_OWNER!!,
      repo: REPO_NAME!!,
      path: `src/content/blog/${fileName}.11tydata.json`,
    });
    content = JSON.parse(
      Buffer.from(fileData.content.toString(), "base64").toString("utf8")
    );
    return {
      sha: fileData.sha,
      postData: content,
    };
  } catch (e) {
    console.error(`No post data found for ${fileName}: ${e.toString()}`);
    content = {
      comments: [],
    };
  }
  return {
    // sha is undefined for things that don't exist (yet)
    sha: undefined,
    postData: content,
  };
}
Checkpoint! Time to test the function. This will make sure the client can connect to GitHub and attempt to read files from the repository:
netlify functions:invoke submission-created --payload './netlify/functions/test-data/post-comment.json'You should see an HttpError thrown because the repository doesn't have an 11tydata file for the post yet. After that, a JSON object containing an array of comments with your test data:
Request from ::1: POST /.netlify/functions/submission-created
Function invoked!
No post data found for add-comments-to-static-site-built-with-netlify-and-eleventy: HttpError: Not Found - https://docs.github.com/rest/repos/contents#get-repository-content
{"comments":[{"id":1738353367988,"createdBy":"Sam","date":"2025-01-22T19:52:16.356Z","html":"Nice post!","website":"storiknow.com"}]}
Response with status 200 in 323 ms.
Congratulations! Your function can now read from GitHub and add an incoming comment to an in-memory array. The final step is to push that data back to GitHub.
Having trouble getting this part to work? Leave a comment with the issue you're having and I'll lend a hand best I can!
Create Branch and Open a Pull Request for the New Comment
The function is now capable of processing a comment, loading data from GitHub and appending the comment to it. It now needs to be modified to do the following:
- Get a reference to the main branch in GitHub.
- Create a new branch relative to the main branch where a new commit will be created containing the modified 11tydata file.
- Create or replace the contents of the 11tydata file in the new branch and create a commit.
- Open a pull request between this new branch and the main branch to see a diff between the current 11tydata file contents and the new 11tydata file contents.
After implementing these changes the function will be complete. Replace the contents of the submission-created.mts with the below code. Be sure to change MAIN_BRANCH_NAME to whatever your main branch is called (e.g. main or master):
import { Context } from "@netlify/functions";
import { Octokit } from "octokit";

const GITHUB_TOKEN = process.env.GITHUB_TOKEN;
const REPO_OWNER = process.env.REPO_OWNER;
const REPO_NAME = process.env.REPO_NAME;
const COMMENT_BRANCH_BASE_NAME = "add-comment";
const MAIN_BRANCH_NAME = "master";

interface PostComment {
  created_at: string;
  data: PostCommentData;
}

interface PostCommentData {
  name: string;
  comment: string;
  referrer: string; // what page the user submitted a comment from
  website: string | undefined;
}

interface PostData {
  comments: {
    id: number;
    createdBy: string;
    html: string;
    date: string;
    website: string | undefined;
  }[];
}
// github rest docs:
// https://docs.github.com/en/rest/repos/contents?apiVersion=2022-11-28#get-repository-content
export default async (request: Request, context: Context) => {
  try {
    const {
      data: { name, comment, website, referrer },
      created_at,
    }: PostComment = (await request.json()).payload;

    if (!name || !comment || !referrer) {
      console.error(
        `Missing at least one required field. Name: ${name}, Comment: ${comment}, Referrer: ${referrer}`
      );
      return { statusCode: 400, body: "Name and comment are required!" };
    }

    const postName = new URL(referrer).pathname.replaceAll("/", "");
    const octokit = new Octokit({ auth: GITHUB_TOKEN });
    const {
      sha,
      postData,
    }: {
      sha: string;
      postData: PostData;
    } = await getPostData(octokit, { fileName: postName });

    const now = Date.now();
    postData.comments.push({
      id: now,
      createdBy: name,
      date: created_at,
      html: comment,
      website: website,
    });

    // Create a new branch off main/master to store the commit containing the new comment
    const mainBranch = await getMainBranch(octokit);
    const commentBranchName = `${COMMENT_BRANCH_BASE_NAME}_${now}`;
    await createCommentBranch(octokit, {
      branchName: commentBranchName,
      fromBranchSha: mainBranch.data.commit.sha,
    });

    // create a new commit for the comment. The "sha" is required if the file already exists, otherwise
    // it'll be undefined (which is expected for new files)
    await octokit.rest.repos.createOrUpdateFileContents({
      owner: REPO_OWNER!!,
      repo: REPO_NAME!!,
      branch: commentBranchName,
      path: `src/content/blog/${postName}.11tydata.json`,
      message: `Comment from ${name} on ${postName}`,
      content: Buffer.from(JSON.stringify(postData, null, 2), "utf8").toString(
        "base64"
      ),
      sha,
    });

    // create the pull request from the latest commit on the new branch and compare it against
    // the main/master branch.
    await octokit.rest.pulls.create({
      owner: REPO_OWNER!!,
      repo: REPO_NAME!!,
      title: `Comment from ${name} on ${postName}`,
      head: commentBranchName,
      base: MAIN_BRANCH_NAME,
      body: `Comment from ${name} on ${postName}`,
    });

    return new Response(`Thanks for commenting!`);
  } catch (error) {
    console.error(`An unexpected error occurred: ${JSON.stringify(error)}`);
    return new Response(error.toString(), {
      status: 500,
    });
  }
};

async function getPostData(octokit, { fileName }): Promise<{ sha; postData }> {
  let content: PostData;
  try {
    const { data: fileData } = await octokit.rest.repos.getContent({
      headers: {
        accept: "application/vnd.github+json",
      },
      owner: REPO_OWNER!!,
      repo: REPO_NAME!!,
      path: `src/content/blog/${fileName}.11tydata.json`,
    });
    content = JSON.parse(
      Buffer.from(fileData.content.toString(), "base64").toString("utf8")
    );
    return {
      sha: fileData.sha,
      postData: content,
    };
  } catch (e) {
    console.error(`No post data found for ${fileName}: ${e.toString()}`);
    content = {
      comments: [],
    };
  }
  return {
    // sha is undefined for things that don't exist (yet)
    sha: undefined,
    postData: content,
  };
}

async function getMainBranch(octokit) {
  return await octokit.rest.repos.getBranch({
    owner: REPO_OWNER,
    repo: REPO_NAME,
    branch: MAIN_BRANCH_NAME,
  });
}

async function createCommentBranch(octokit, { branchName, fromBranchSha }) {
  await octokit.rest.git.createRef({
    owner: REPO_OWNER,
    repo: REPO_NAME,
    ref: `refs/heads/${branchName}`,
    sha: fromBranchSha,
  });
}
Final Checkpoint! This test will make sure a pull request gets created with the expected contents. Invoke the function:
netlify functions:invoke submission-created --payload './netlify/functions/test-data/post-comment.json'Login to GitHub and open your repository, then click the Pull requests tab. You should see a new pull request like so: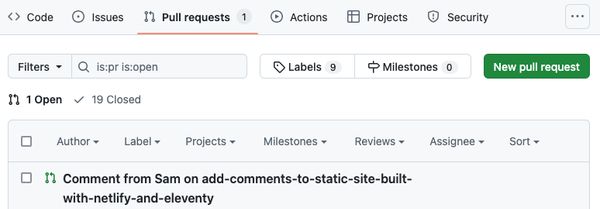
Open the pull request and click the Files changed tab to see the 11tydata file. If this is the first time a comment is being added for a post the file will be new like the one below, otherwise it'll show a diff with the new comment being added: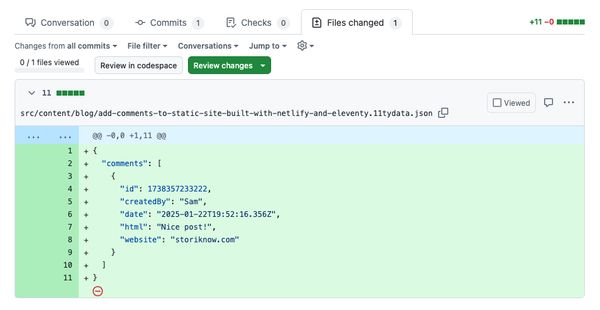
To merge the pull request and accept it into your repository click the Conversation tab and scroll down, then click Merge pull request followed by Confirm merge. To reject the pull request (and the comment), scroll down on that same tab and click Close pull request.
If your setup is like mine, merging the pull request will kick-off a build and deploy of your site. The 11tydata file will then be added to your repository and available locally by doing a git pull.
Tip: download the GitHub app and setup notifications whenever a PR is opened to be notified when a new comment shows up on your post. You can also review and approve it from there!
Congratulations! You now have a mechanism for processing and merging comments through a Netlify function and GitHub. The next step is to load comments for each post when 11ty generates the site. Later, a form will be added to each post to allow visitors to comment.
Having trouble getting this part to work? Leave a comment with the issue you're having and I'll lend a hand best I can!
Loading and Displaying Comments on a Post
Now that comments are capable of flowing through the system it's time to materialize those comments in the post itself. All comments (and any post-specific data) now live in the 11tydata template data file your new function creates and maintains.
To help visualize this, here's a simplified structure of my website:
📦storiknow
 ┣ 📂netlify
    ┣ 📂functions
    ┃ ┣ 📂test-data
    ┃ ┃ ┗ 📜post-comment.json
    ┃ ┗ 📜submission-created.mts
 ┣ 📂src
    ┣ 📂_includes
    ┃ ┣ 📂components
    ┃ ┃ ┣ 📜footer.html
    ┃ ┃ ┣ 📜header.html
    ┃ ┃ ┗ 📜sidebar.html
    ┃ ┗ 📂layouts
    ┃ ┃ ┣ 📜base.html
    ┃ ┃ ┗ 📜post.html
    ┣ 📂assets
    ┃ ┣ ...
    ┃ ┣ 📂images
    ┃ ┃ ┣ 📂blog
    ┃ ┃ ┃ ┣ 📜add-post-comments-github-pr-file-changes.png
    ┃ ┃ ┃ ┣ ...
    ┃ ┣ ...
    ┣ 📂content
    ┃ ┣ 📂blog
    ┃ ┃ ┣ 📜add-comments-to-static-site-built-with-netlify-and-eleventy.11tydata.md
    ┃ ┃ ┣ 📜add-comments-to-static-site-built-with-netlify-and-eleventy.md
    ┃ ┃ ┣ 📜blog.json
    ┃ ┣ 📂pages
    ┃ ┣ ┣ ...
    ┃ ┗ 📜content.json
    ┣ 📜_redirects
    ┣ 📜index.html
    ┣ 📜robots.html
    ┗ 📜sitemap.html
src -> content -> blog is where all my blog post markdown and 11tydata files live. blog.json is another type of template file that applies front matter to an entire directory by matching its filename with the folder name (e.g. blog.json matches blog). blog.json has the following content:
{
    "layout": "layouts/post.html",
    "eleventyComputed": {
        "preloadImg": "{{ image }}",
        "permalink": "/{{ url | slug }}/index.html"
    },
    "tags": "post",
    "categories": "post",
    "preloadCSS": "/assets/css/blog.css"
}
When 11ty converts each markdown file (blog post) into static HTML it uses the post.html layout template as the structure of the post. post.html will have access to global front matter/data (e.g. blog.json) as well as localized/post-specific data (e.g. .11tydata.json). In other words, for each blog post within the blog folder the data from the 11tydata with the same name will be accessible during rendering.
After merging the pull request from the previous section the 11tydata file for this post has the following:
{
  "comments": [
    {
      "id": 1738357233222,
      "createdBy": "Sam",
      "date": "2025-01-22T19:52:16.356Z",
      "html": "Nice post!",
      "website": "storiknow.com"
    }
  ]
}Tip: if you didn't merge the pull request just create an 11tydata file with the same name as your post file and populate it with the sample data above for now.
The comments property is directly accessible to the post.html layout template, like so:
{% for comment in comments | reverse %}
   ...
{% endfor %}
That's powerful! With the post comments available it becomes a simple HTML/CSS exercise to display the content. Here's a crude example to convey the point - you'll need to apply styling and such to meet your websites needs:
{% if comments %}
<section id="comments">
  <h2 class="title">Comments</h2>
  <ul>
    {% for comment in comments | reverse %}
    <li>
      <div class="content">
        <p class="comment-name">
          {{ comment.createdBy }}
        </p>
        <div class="bottom-wrapper">
          <p class="comment-date">
            {{ comment.date }}
          </p>
          <p class="comment-content">{{ comment.html | safe }}</p>
        </div>
      </div>
    </li>
    {% endfor %}
  </ul>
</section>
{% endif %}
Each post is now capable of rendering its own comments! The next and final step: accepting comments from visitors by adding a Netlify form.
Having trouble getting this part to work? Leave a comment with the issue you're having!
Adding a Netlify Form to Allow Post Comments
Netlify Forms require no additional API calls or javascript to function. At a high level, adding a form requires enabling form detection in Netlify's console and including the form on your website. Netlify handles the rest like validating data, bot detection and spam reduction, persisting form content server-side and triggering form handler functions like the one created in this post.
To enable form detection (from the docs):
- Login to Netlify UI and open your site
- In the left-hand menu choose Forms
- Select Enable form detection
Next time Netlify builds your site the build process will scan your forms for a netlify attribute. If a form has netlify as an attribute then Netlify will hijack that form and become the handler for it.
In the post.html layout file (or equivalent in your project), add an HTML form by following these steps. The function created in this post expects at minimum a field named name and comment to be provided, with website optional. Here's what this site's comment form looks like:
<form
  id="commentsForm"
  name="post-comments"
  method="post"
  netlify
  data-netlify-recaptcha="true"
  netlify-honeypot="bot-field"
>
  <label for="name">Name
    <input
    required
    type="text"
    id="name"
    name="name"
    placeholder="Name"
  />
  </label>

  <label for="website">
    Website (optional)
    <input
      type="text"
      id="website"
      name="website"
      placeholder="Website"
    />
  </label>
  <label for="comment">
    <textarea
      required
      name="comment"
      id="comment"
      placeholder="Write a comment..."
    ></textarea>
  </label>
  <p class="hidden">
    <label>
      Don’t fill this out if you’re human: <input name="bot-field" />
    </label>
  </p>
  <div data-netlify-recaptcha="true"></div>
  <button type="submit">Submit Comment</button>
</form>
A couple things to note:
- The form name is
post-comments. Netlify will use this when naming your form in the back-end. - The form has a honeypot field and a reCAPTCHA challenge to reduce bots/spam.
Netlify built-in function events like submission-created can't be triggered automatically by Netlify in a local dev environment. That means in order to test the function is triggered when a form is submitted the form and function must be deployed to your website and invoked from a Netlify hosted server (i.e. not your local machine).
Tip: use CSS to hide the form if you don't have a server-side dev environment to test in. That way the form isn't visible to users yet, and you can simply modify the HTML (through browser developer tools) to unhide it for testing.
Deploying the Netlify Form and Function
Deploy the changes you made to introduce a new form to your site. After the build and deployment completes verify Netlify sees your form submission function:
- Login to Netlify and open your site details.
- On the left-hand menu click Logs -> Functions.
- Under the Functions section you should see N Lambda functions actively running in productions where N is the number of functions you own. If this is your first function that'll be 1.
- Below the Functions section you should see a function called submission-created.
If you don't see a function here Netlify isn't finding the function under netlify/functions directory. Double-check your function is in the default directory at the root of your project.
Before the form invokes the function in the Netlify server environment the environment needs to know the values to use for the environment variables the function depends on (e.g. GITHUB_TOKEN, REPO_OWNER, REPO_NAME):
- Login to Netlify and open your site details.
- On the left-hand menu click Site configuration.
- Click Environment variables, then on the right click Add a variable -> Add a single variable.
- Create a key/value pair matching those in your local environment.
Now confirm Netlify sees your form:
- Login to Netlify and open your site details.
- On the left-hand menu click Forms.
- Under Active forms you should see post-comments (or whatever you named your form).
With all that in place it's time for a test. Open your website and fill in the form fields then submit the form. After submitting you should be directed to the default "thank you" page created by Netlify. Netlify functions are invoked within seconds of a form submission being received and the function completes execution within seconds after an event. After a few seconds login to GitHub and confirm there's a new pull request waiting for your review.
Tip: Not seeing a pull request? Netlify functions capture and make logs accessible to you. Under your site's configuration left-hand menu click Logs -> Functions -> Open your function, then change the timespan from Real-time to Last hour. If there's nothing useful here add log statements (e.g.
console.log(...)) to your function, deploy it again and check where it breaks.
Conclusion
Congratulations! You've successfully implemented a system to capture visitor feedback on your posts, enhancing engagement and interaction to your static site. Netlify forms, GitHub, and Netlify serverless functions combined create a seamless commenting experience and make it easy to moderate comments before accepting them.
If you want to take commenting to the next level head over here where I walk through how to make trivial modifications to the handler function so your visitors can use markdown. Let your readers have a little fun!


Comments
Leave a Comment
David Matthew
February 22, 2025 at 8:17:26 PM UTC
Fantastic post, thank you! I'll be relying on this when I migrate my own website from WordPress to 11ty (like you I use the latter a lot but have neglected my own site). This is also a great contribution to the 11ty community - it would be nice to see it listed here as I'm sure it would help others too.